Sunday, February 12, 2012

Eat Your Heart Out

Another baking adventure, another person's kitchen to take over. Food bribery works wonders!

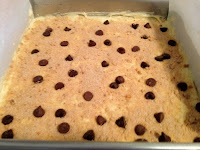
This past week my cousin told me about a Valentine's Day bake-off that her office is having. Being that my love for baking is quite evident, she thought it was something I'd be interested in. And she was right. Since the rules state that you can enter up to 2 items I decided to do just that. I whipped up a batch of banana chocolate chip blondies and special Valentine's Day themed cookies.

Although I love the banana blondies and I know how much everybody else loves them, I am really proud of these cookie sandwiches. Unlike the blondies that I have made hundreds of (literally) I have never made these cookies. They look cute and taste even better! OH and super simple to make!

Shortbread Cookie Sandwiches with Raspberry Filling

INGREDIENTS (Recipe adapted from JoyofBaking.com)
This recipe should be done ahead of time to allow dough to chill for at least 1 hour.
2 cups all purpose flour
1/4 teaspoon salt
2 sticks unsalted butter (room temperature)
1/2 cup powdered sugar
1 teaspoon vanilla extract
  • Beat butter until smooth.
  • Add the powdered sugar, beating in slowly (just because you the powdered sugar to stay in the bowl, not fly out and land on the counter ... or on you).
  • Beat the butter and sugar until it is completely combined and smooth.
  • Next, add the vanilla extract.
  • Slowly, add the flour (easiest if you add the flour in 2 or 3 batches). Beat in the flour until the mixture has completely come together, making sure not to over beat. Should be less than 1 minute.
  • Gather dough into a disc, wrap in plastic wrap and refrigerate for at least 1 hour (can even be done over night).
  • Once chilled, use 1/2 of the dough and put the remaining half back in the fridge to chill.
  • Lightly dust the dough with flour, to ensure that the it does not stick when being rolled out.
  • Place the dough between two sheets of wax paper and roll until it is about 1/4in thick.
  • Using a cookie cutter, cut out the dough and place on a lined baking sheet about an inch apart. Then place it back in the fridge for about 10minutes before baking. This will allow the dough to firm up.
  • Then bake at 350degrees Fahrenheit for 8-10 minutes (depending on the thickness of your cookie). 
  • They are done when the edges are a light brown.
  • Repeat with the remaining half of the dough.  
  • To make the cookie sandwiches, cut out the same amount of top and bottom cookies. To create a 'window' for the top cookie, place the cut out cookies on the baking sheet first! Then take a smaller cookie cutter and cut out a window. Removing the little cookie center that you just made. It is best to do this on the baking sheet because you are less likely to break the cookie. I discovered that after breaking 3 cookies in a row because it was too fragile to transfer from table to sheet. Once your cookies are baked and cool, dust powdered sugar on the top cookies only. Add a small dollop of raspberry jam (I used seedless just for aesthetic reasons) to the bottom cookie. Spread the jam, leaving some space near the edges. Then carefully place the top cookie, trying not to get the powdered sugar onto the jam. When sandwiching the cookies together, try not to apply too much pressure or the jam will ooze out the sides (which is why you should try not to spread the jam to the edges of the cookie). And that's it! Once you're done marveling at how cute they are, because they really are, you can eat a whole bunch. They're kind of addicting!


happy valentine's day!

Saturday, February 4, 2012

Whoa! That's old!

The other day I went to babysit my cousin's three kids. At one point the eldest had asked me how old I was. In which I answered "23." The youngest then asked how old my mom was. She's 60, I said. He quickly replied, "Whoa! That's old!"
In the eyes of a 3 year old, being 60 is the same as being a dinosaur. Ancient and unfathomable. 
While it does seem old, you are never too old for cake. So to celebrate my mom's birthday (which is actually today) I had made a yellow cake and chocolate (ganache) frosting.

INGREDIENTS
2  1/4 cups of flour
1 teaspoon salt
3 teaspoons baking powder
1 stick of butter (room temperature) 
1  1/2 cup sugar
3 eggs
1/2 cup evaporated milk
1/2 cup water
1 teaspoon vanilla

  • Grease and line a 9x13in pan (2 circular 9in pans will work as well). Preheat oven to 350 degrees Fahrenheit. 
  • In a separate bowl, sift the dry ingredients (flour, baking powder, salt) together. 
  • Beat together butter and sugar until smooth.
  • Add the eggs one at a time, making sure each egg is fully incorporated before adding the next.
  • Add the evaporated milk, water and vanilla slowly.

  • Once the mixture is combined and smooth, slowly beat in the dry ingredients.
  • Now the batter should be light and smooth.
  • Pour the batter into your pan(s) and bake for 20 minutes. 
  • When the cake is done baking, the center will have a 'bounce' to it. Gently press the center and you will be able to see the indent from your finger bounce back. If you're not sure, try the toothpick test. That's my go to answer for everything.
To frost the cake, I just made a chocolate ganache and whipped it for a couple of minutes until it was light and fluffy. I think this experiment went fairly well. Clearly decorating cakes isn't my thing but I needed a quick, simple and yummy frosting so this seemed like the way to go.


Here's the finished product. I have never made a yellow cake before. For a first attempt, I'd consider this a success. It was moist and tasted like a true yellow cake. However, my sister said the chocolate frosting overpowered the cake's flavor. I on the other hand enjoyed it. Maybe that's because it tasted like an airy chocolate bar. So what's not to love about that? I guess the next time I experiment with this recipe, the frosting will need to be altered.

All this typing has worked up an appetite. Time for another slice of cake.


Friday, February 3, 2012

The Traveling Baker

I am now a traveling baker. Reason being, the oven at home is broken so I often find myself baking at other people's kitchens. Although I may lug a hefty supply of ingredients, utensils, and bakeware I can assure you my intruding does have it's benefits.

The lucky person whose kitchen I have taken over for the day (along with many other days the past couple of weeks) belongs to my sister. I consider this all an even exchange: you lend me your kitchen and you get to eat whatever it is a make. Since my baked goods yield generous portions, the "extras" tend to go to friends and co-workers. So, really it is a win - win situation.

First up on today's menu is Coffee Cake.
[Note: 1. does not have the typical crumb topping 2. contains chocolate chips]

INGREDIENTS


Batter
2 cups unbleached all purpose flour
1 teaspoon baking powder
1/2 teaspoon salt
1 cup sugar
1 stick of butter (room temperature)
2 eggs
1 cup of sour cream
1 teaspoon vanilla extract
1/2 cup chocolate chips (I prefer 1/4 cup semi-sweet and 1/4 cup milk chocolate)

Topping
2 tablespoons sugar
1/4 cup brown sugar
1 tablespoon cinnamon

  • Grease and line a 9x9in pan with parchment paper. Preheat oven to 350 degrees Fahrenheit.
  • Sift together dry ingredients (flour, baking powder, and salt) in a bowl and set aside.
  • Combine topping ingredients and set aside.

  • Cream butter and sugar until it comes together.
  • Beat in the eggs one at a time. Making sure each egg has been incorporated before adding the next.
  • Add sour cream and vanilla. The mixture should now be a pale yellow.
  • Slowly add in the dry ingredients. [Note: I like to add the dry ingredients in thirds, making sure each batch is fully mixed in before continuing.]
  • Scrape the sides and the bottom because flour tends to accumulate at the base of the bowl. You don't want a big clump of flour when you pour your batter into the pan.
  • Next, pour HALF of the batter into your pan.
  • Take half of your cinnamon sugar mixture and sprinkle it on top of your batter. 
  • Then, add half of your chocolate chip (mix) on top of your sugar layer.

  • Now repeat. Pour the remaining batter, followed by the cinnamon sugar, and then the chocolate chips.

  • Bake for 20-25 minutes. Or until the toothpick test comes out clean. That's my own terminology for: insert a toothpick in the middle of the cake and when it comes out clean (no batter adhering to the toothpick) then it is done.

                           
Let it cool. Slice it. Eat.
Oh, then wash dishes sigh.

Thursday, February 2, 2012

Day 1

Hello there cyber space.

I've been wanting to create a blog for some time now. I knew I wanted to blog about baking, but I thought 'There are tons of baking blogs. Many with a huge following, so what exactly would my little blog have to offer?'
Well, I finally came to the realization that this blog would not be solely devoted to baking.
I know, the title of this might throw you off. After all, it is called "The Little Baker." And while baking will encompass majority of this space, this blog will also include a number of things that I hold dear. (That was actually a lovely way of saying, I'm going to write about a bunch of random things aside from baking.)

Truthfully speaking, I wanted to create a blog to chronicle the things I experience. Whether it be a baking session that has gone awry, a visit to an eatery that I'm obsessed with, or the ridunkulous things I hear/learn from babysitting. I can promise that my posts will definitely consist of a random variety of topics.

This is my journey.